编程

CentOS6由于版本过老和源组织不当等原因,成功安装Python3和一些较新的依赖库是一件很幸运的事情。这里记录下遇到的报错和解决过程。
按照惯例,先记录一下报错内容,方便搜索引擎索引:

1
2
3
4
5
6
7
8
9
10
11
12
[root@localhost ~]# pip3 install --upgrade pip
pip is configured with locations that require TLS/SSL, however the ssl module in Python is not available.
Retrying (Retry(total=4, connect=None, read=None, redirect=None, status=None)) after connection broken by 'SSLError("Can't connect to HTTPS URL because the SSL module is not available.")': /simple/pip/
Retrying (Retry(total=3, connect=None, read=None, redirect=None, status=None)) after connection broken by 'SSLError("Can't connect to HTTPS URL because the SSL module is not available.")': /simple/pip/
Retrying (Retry(total=2, connect=None, read=None, redirect=None, status=None)) after connection broken by 'SSLError("Can't connect to HTTPS URL because the SSL module is not available.")': /simple/pip/
Retrying (Retry(total=1, connect=None, read=None, redirect=None, status=None)) after connection broken by 'SSLError("Can't connect to HTTPS URL because the SSL module is not available.")': /simple/pip/
Retrying (Retry(total=0, connect=None, read=None, redirect=None, status=None)) after connection broken by 'SSLError("Can't connect to HTTPS URL because the SSL module is not available.")': /simple/pip/
Could not fetch URL https://pypi.org/simple/pip/: There was a problem confirming the ssl certificate: HTTPSConnectionPool(host='pypi.org', port=443): Max retries exceeded with url: /simple/pip/ (Caused by SSLError("Can't connect to HTTPS URL because the SSL module is not available.")) - skipping
Requirement already up-to-date: pip in /usr/local/lib/python3.7/site-packages (19.0.3)
pip is configured with locations that require TLS/SSL, however the ssl module in Python is not available.
Could not fetch URL https://pypi.org/simple/pip/: There was a problem confirming the ssl certificate: HTTPSConnectionPool(host='pypi.org', port=443): Max retries exceeded with url: /simple/pip/ (Caused by SSLError("Can't connect to HTTPS URL because the SSL module is not available.")) - skipping

解决方法:

1.编译安装OpenSSL 1.0.2j版本并配置环境变量

下载OpenSSL源码包:

wget http://www.openssl.org/source/openssl-1.0.2j.tar.gz

解压缩,编译安装:

1
2
3
4
tar -zxvf openssl-1.0.2j.tar.gz
cd openssl-1.0.2j
./config --prefix=/usr/local/openssl-1.0.2j shared zlib
make && make install

2.编译安装Python3,使用自定义的OpenSSL

下载Python3.7.3源码包:

wget https://www.python.org/ftp/python/3.7.3/Python-3.7.3.tgz

解压缩,编译安装:

1
2
3
tar -zxvf Python-3.7.3.tgz
cd Python-3.7.3
./configure

在这一步之后,先不要着急运行make命令。先修改Modules/Setup文件:

1
2
3
4
5
6
7
8
9
10
11
12
13
14
# Socket module helper for socket(2)
#_socket socketmodule.c

# Socket module helper for SSL support; you must comment out the other
# socket line above, and possibly edit the SSL variable:
SSL=/usr/local/openssl-1.0.2j/ #取消这一行的注释,并将原来的/usr/local/ssl改为/usr/local/openssl-1.0.2j/
_ssl _ssl.c \ #取消这一行的注释
-DUSE_SSL -I$(SSL)/include -I$(SSL)/include/openssl \ #取消这一行的注释
-L$(SSL)/lib -lssl -lcrypto #取消这一行的注释

# The crypt module is now disabled by default because it breaks builds
# on many systems (where -lcrypt is needed), e.g. Linux (I believe).

#_crypt _cryptmodule.c # -lcrypt # crypt(3); needs -lcrypt on some systems

修改完成以后,还需要创建两个指向动态链接库的软链接文件:

1
2
ln -s /usr/local/openssl-1.0.2j/lib/libssl.so.1.0.0 /usr/lib64/libssl.so.1.0.0
ln -s /usr/local/openssl-1.0.2j/lib/libcrypto.so.1.0.0 /usr/lib64/libcrypto.so.1.0.0

最后编译并安装:

1
make && make install

安装完成以后,再次运行pip3 install --upgrade pip,可以看到原先SSL连接报错的问题已经解决:

1
2
3
4
5
6
7
8
9
[root@localhost Python-3.7.3]# pip3 install --upgrade pip
Collecting pip
Using cached https://files.pythonhosted.org/packages/5c/e0/be401c003291b56efc55aeba6a80ab790d3d4cece2778288d65323009420/pip-19.1.1-py2.py3-none-any.whl
Installing collected packages: pip
Found existing installation: pip 19.0.3
Uninstalling pip-19.0.3:
Successfully uninstalled pip-19.0.3
Successfully installed pip-19.1.1

在以root用户运行Puppeteer程序时,遇到一些错误,这里记录下解决的过程。
首先提示一个X11错误,这是因为我在服务器上运行Chrome,而服务器没有安装桌面环境导致的。
安装以下依赖项即可,以Debian系统为例:

1
apt-get install gconf-service libasound2 libatk1.0-0 libc6 libcairo2 libcups2 libdbus-1-3 libexpat1 libfontconfig1 libgcc1 libgconf-2-4 libgdk-pixbuf2.0-0 libglib2.0-0 libgtk-3-0 libnspr4 libpango-1.0-0 libpangocairo-1.0-0 libstdc++6 libx11-6 libx11-xcb1 libxcb1 libxcomposite1 libxcursor1 libxdamage1 libxext6 libxfixes3 libxi6 libxrandr2 libxrender1 libxss1 libxtst6 ca-certificates fonts-liberation libappindicator1 libnss3 lsb-release xdg-utils wget

接着就是报了一个sandbox错误,报错内容是这样的:

1
2
3
4
5
6
7
8
9
10
11
12
13
14
15
16
17
18
19
(node:4963) UnhandledPromiseRejectionWarning: Error: Failed to launch chrome!
[0428/104254.469304:ERROR:zygote_host_impl_linux.cc(89)] Running as root without --no-sandbox is not supported. See https://crbug.com/638180.


TROUBLESHOOTING: https://github.com/GoogleChrome/puppeteer/blob/master/docs/troubleshooting.md

at onClose (/root/monkey/node_modules/puppeteer/lib/Launcher.js:342:14)
at Interface.helper.addEventListener (/root/monkey/node_modules/puppeteer/lib/Launcher.js:331:50)
at emitNone (events.js:111:20)
at Interface.emit (events.js:208:7)
at Interface.close (readline.js:370:8)
at Socket.onend (readline.js:149:10)
at emitNone (events.js:111:20)
at Socket.emit (events.js:208:7)
at endReadableNT (_stream_readable.js:1064:12)
at _combinedTickCallback (internal/process/next_tick.js:138:11)
(node:4963) UnhandledPromiseRejectionWarning: Unhandled promise rejection. This error originated either by throwing inside of an async function without a catch block, or by rejecting a promise which was not handled with .catch(). (rejection id: 1)
(node:4963) [DEP0018] DeprecationWarning: Unhandled promise rejections are deprecated. In the future, promise rejections that are not handled will terminate the Node.js process with a non-zero exit code.

不了解具体的含义,但是从sandbox来看,应该是和Chrome的安全沙箱有关,单纯的想解决这个问题,只需要在代码中加入--no-sandbox启动Chrome的参数即可。

Example:

1
2
3
4
5
6
7
const puppeteer = require('puppeteer');
(async () => {
const browser = await puppeteer.launch({args: ['--no-sandbox']});
const page = await browser.newPage();
await page.goto("https://www.baidu.com");
await browser.close();
})()

Tips:

但是这样做可能会造成一些风险,主要是Chrome的sandbox会多一些安全特性(我理解的),如果是将Node的代码作为生产环境运行在产品中,还是需要谨慎一些的,确保请求的站点安全可信(最好不信)。

找Rails靠谱的编辑器是不是找了好久了?别找了,就用Simditor吧。
要如何在Rails中完美集成这样一个简洁大气又好用的编辑器呢?我们都知道,在高版本的Rails中使用CoffeeScript已经成为了一种习惯。所以本文将以CoffeeScript作为粘合剂来演示如何集成Simditor编辑器到Rails应用中,同时采用Rails原生的ActiveStorage作为上传支撑。

事先声明下我的环境配置:
Ruby: ruby 2.4.1p111 (2017-03-22 revision 58053) [x86_64-linux]
Rails: Rails 5.2.2

1. 准备工作

首先我们新建一个Rails项目,在命令行中,运行rails new Demo,待工程创建好以后我们进入Demo目录,新建一个脚手架。这里我们就以Article作为脚手架的名字,运行rails g scaffold Article title:string content:text

创建好之后,运行rails db:migrate,迁移数据库

此时,将simeditor添加到Gemfile中。修改Gemfile,加入以下内容并执行bundle(simditor需要jquery的支持)。

1
2
gem 'jquery-rails'
gem 'simditor'

并在app/assets/javascripts/application.js中加入simditor的引用,此处需要注意,下面两行代码需要添加在//= require_tree这行代码之前,否则会出错。

1
2
3
//= require jquery
//= require simditor
//= require_tree .

同时需要在app/assets/stylesheets/application.css中加入simditor的样式文件:

1
*= require simditor

启动Rails应用,在浏览器中访问/articles/new,此时的界面如下:

到这里,准备工作就完成了。

2. 修改编辑框,集成Simditor

按照Rails的命名惯例,此处编辑框textarea的ID是article_content,我们的CoffeeScript脚本中,则需用选择器来绑定这个text_area。

修改app/assets/javascripts/article.coffee,加入以下内容:

1
2
3
4
5
6
7
8
9
10
11
12
13
14
$(document).on "turbolinks:load", ->
editor = new Simditor(
textarea: $('#article_content')
toolbar: [ 'bold', 'italic', 'underline', 'strikethrough', 'color',
'code', 'blockquote', 'link', 'image', 'ol', 'ul', 'table', 'indent','outdent','alignment']
pasteImage: true,
fileKey: 'file',
upload: {
url: '/images',
params: {"content":"image"},
connectionCount: 3,
leaveConfirm: '有图片正在上传,确定要离开?'
})

再次在浏览器中访问/articles/new,界面变成了这样:

此时Simditor已经集成到了应用中了。

3. 使用ActiveStorage配置上传功能

ActiveStorage是Rails 5.2 以后推出的用于专门管理Web上传内容的组件,和ActiveRecord一样,是一个很方便同时又很强大的Rails Web开发组件。想要集成基于ActiveStorage的上传功能,首先要在我们的应用中安装ActiveStorage:

运行rails active_storage:install然后再运行rails db:migrate:

1
2
3
4
5
6
7
8
9
root@debian:~/Demo# rails active_storage:install
Copied migration 20190327123314_create_active_storage_tables.active_storage.rb from active_storage
root@debian:~/Demo# rails db:migrate
== 20190327123314 CreateActiveStorageTables: migrating ========================
-- create_table(:active_storage_blobs)
-> 0.0050s
-- create_table(:active_storage_attachments)
-> 0.0027s
== 20190327123314 CreateActiveStorageTables: migrated (0.0086s) ===============

迁移完成以后,我们新建一个Upload控制器,使用rails g controller Upload命令生成它。修改Upload控制器代码,位于app/controllers/upload_controller.rb,添加一个upload方法:

1
2
3
4
5
6
7
8
9
10
11
12
13
14
15
16
17
18
19
20
21
22
23
24
25
26
27
28
29
30
31
#app/controllers/upload_controller.rb
class UploadController < ApplicationController

skip_before_action :verify_authenticity_token, :only => [:upload]

def upload

puts "*"*64
puts params

blob = ActiveStorage::Blob.create_after_upload!(
io: params[:image],
filename: params[:image].original_filename,
content_type: params[:image].content_type
)

if blob.save
success = true
msg = 'upload success'
else
success = false
msg = "upload error"
end

render json: { :success=> success, :msg=>msg, :file_path=> rails_blob_path(blob) }

end

end


修改路由配置文件,指定我们的上传路由:

1
2
3
4
5
6
7
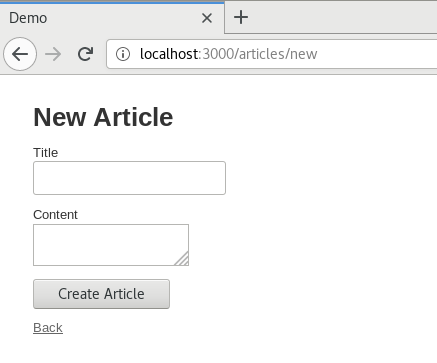
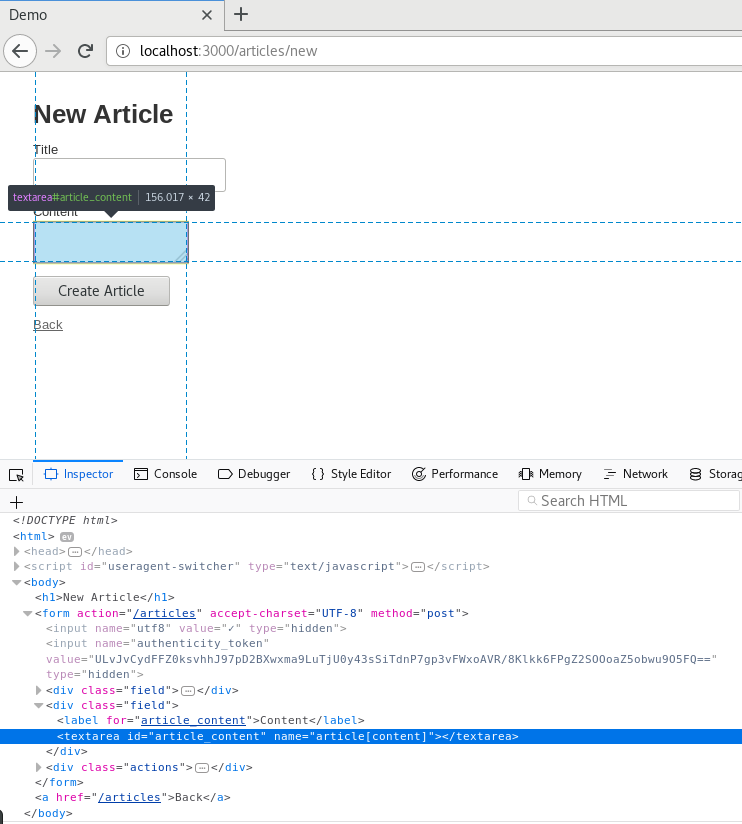
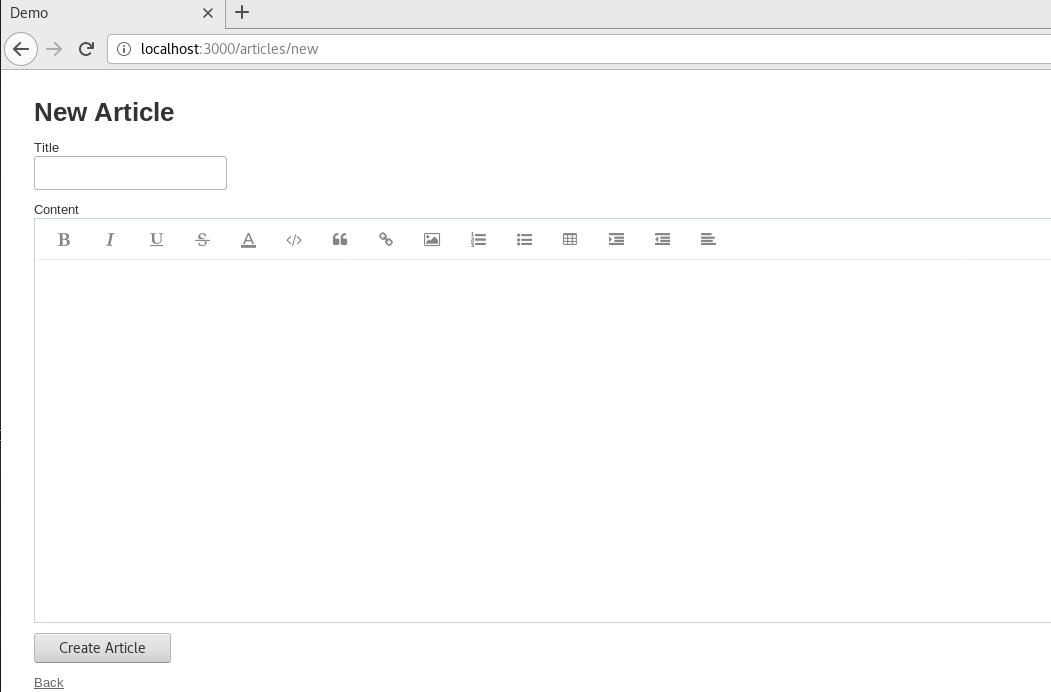
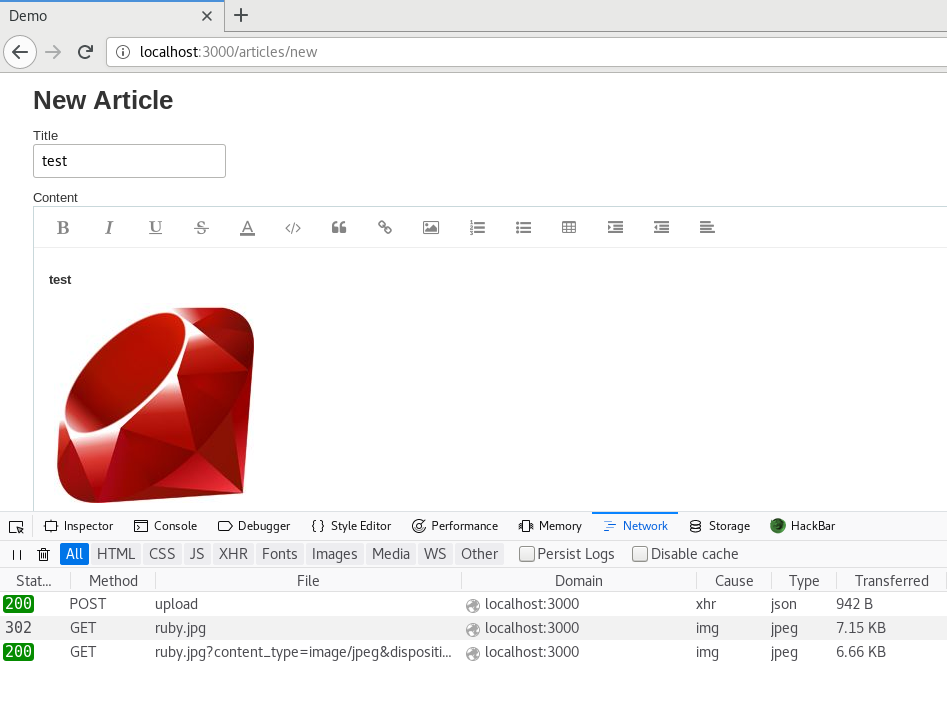
#config/routes.rb
Rails.application.routes.draw do
post 'images/upload' => 'upload#upload'
resources :articles
root to: 'articles#index'
# For details on the DSL available within this file, see http://guides.rubyonrails.org/routing.html
end

还要稍微修改一下我们的articles.coffee文件,改一下其中的上传路径和参数,用于Ajax提交图片:

1
2
3
4
5
6
7
8
9
10
11
12
13
14
15
16
//app/assets/javascripts/articles.coffee
$(document).on "turbolinks:load", ->
editor = new Simditor(
textarea: $('#article_content')
toolbar: [ 'bold', 'italic', 'underline', 'strikethrough', 'color',
'code', 'blockquote', 'link', 'image', 'ol', 'ul', 'table', 'indent','outdent','alignment']
pasteImage: true,
fileKey: 'file',
upload: {
url: '/images/upload', //<==上传接口
fileKey: 'image', //<=参数名称
params: {"content":"image"},
connectionCount: 3,
leaveConfirm: '有图片正在上传,确定要离开?'
})

至此,已经可以在页面中正常地上传文件了,也可以直接从粘贴板复制文件,Simditor会自动上传文件:

本文涉及到的代码已经上传到Github,仓库链接:https://github.com/Chorder/RailsSimditorActiveStorageDemo

最近睡前把《Ruby元编程》作为枕边书,复习一些元编程技巧。顺手整理记录下这些技巧的同时,也为了这门语言能更广泛地传播,希望有更多的人喜欢Ruby这个神器。

一切都是对象

来到Ruby的世界,请你首先不要被这一切搞晕,实际上这些反而让Ruby的对象模型概念变得更加清晰。一切都是对象,对象是一个类,类也是一个对象。而实际上类是一个带有特殊功能的模块。

1
2
3
4
5
6
7
8
9
10
11
2.5.1 :001 > Class.superclass
=> Module
2.5.1 :002 > Module.superclass
=> Object
2.5.1 :003 > Object.superclass
=> BasicObject
2.5.1 :004 > BasicObject.superclass
=> nil
2.5.1 :005 > Kernel.class
=> Module

模块的超类是BasicObject,BasicObject才是Ruby类系统的根。BasicObject派生了Objce和Kernel,Object又派生出了Module,Module派生出Class。
这像不像道德经里所说的“道生一,一生二,二生三,三生万物”? 再说下去更迷糊了,去Ruby的世界里自己领悟吧。Ruby诞生自亚洲,一直觉得它是一门充满东方哲学的编程语言。

1
2
3
4
5
6
7
8
9
10
11
12
13
14
15
16
17
18
19
2.5.1 :001 > Class.ancestors
=> [Class, Module, Object, Kernel, BasicObject]
2.5.1 :002 > Class.superclass
=> Module
2.5.1 :003 > Module.ancestors
=> [Module, Object, Kernel, BasicObject]
2.5.1 :004 > Module.superclass
=> Object
2.5.1 :005 > Object.ancestors
=> [Object, Kernel, BasicObject]
2.5.1 :006 > Object.superclass
=> BasicObject
2.5.1 :007 > BasicObject.superclass
=> nil
2.5.1 :008 > Kernel.ancestors
=> [Kernel]
2.5.1 :009 > BasicObject.ancestors
=> [BasicObject]

猴子补丁(Monkey Patch)

在元编程的所有技巧中,首先需要了解的就是Ruby的“猴子补丁”,这是一种打开类的技巧。不同于其他面向对象语言,Ruby的任何类都可以在运行态打“补丁”的,称之为Monkey Patch。

例如,对字符类String,可以在任何地方打开这个类,对它添加一些方法:

1
2
3
4
5
6
7
8
9
10
11
12
13
14
2.5.1 :001 > class String
2.5.1 :002?> def test_method
2.5.1 :003?> return self+"AAA"
2.5.1 :004?> end
2.5.1 :005?> end
=> :test_method
2.5.1 :006 > s="aaa"
=> "aaa"
2.5.1 :007 > s.class
=> String
2.5.1 :008 > s.test_method
=> "aaaAAA"
2.5.1 :009 >

在上面的操作中,我们可以看到,对于Ruby的内置类String,我们为其添加了test_method方法,在下文中,任何的String对象便具有了新添加的这个方法,这就是Ruby打开类的魔术。

你甚至可以对内核模块Kernel打一个Monkey Patch,让你的方法在下文中得到全局支持:

1
2
3
4
5
6
7
8
9
10
11
12
13
14
15
16
17
2.5.1 :001 > test
Traceback (most recent call last):
3: from /home/chorder/.rvm/rubies/ruby-2.5.1/bin/irb:11:in <main>
2: from (irb):1
1: from (irb):1:in test
ArgumentError (wrong number of arguments (given 0, expected 2..3))
2.5.1 :002 > module Kernel
2.5.1 :003?> def test
2.5.1 :004?> puts "OK"
2.5.1 :005?> end
2.5.1 :006?> end
=> :test
2.5.1 :007 > test
OK
=> nil
2.5.1 :008 >

不同的是,Kernel是一个模块,需要用module关键字来打开。test方法一开始是不存在的,把它作为“补丁”加入到Kernel模块以后,就可以在下文调用了。

Monkey Patch在有些编程语言里是个贬义词,但在Ruby里,它是一个很实用的功能。

细化(refine)

如你所见,Ruby打开类的作用是如此神奇,以至于Monkey Patch一不小心可能会引发一些大的问题。因此有时候需要配合类的细化功能一起使用。

细化的用法如下:

1
2
3
4
5
6
7
8
9
10
11
12
13
14
15
16
17
18
19
2.5.1 :001 > module Refine
2.5.1 :002?> refine String do
2.5.1 :003 > def test
2.5.1 :004?> return self+"TEST"
2.5.1 :005?> end
2.5.1 :006?> end
2.5.1 :007?> end
=> #<refinement:String@Refine>
2.5.1 :008 > "AAA".test
Traceback (most recent call last):
2: from /home/chorder/.rvm/rubies/ruby-2.5.1/bin/irb:11:in <main>
1: from (irb):8
NoMethodError (private method test called for "AAA":String)
2.5.1 :009 > module Test
2.5.1 :010?> using Refine
2.5.1 :011?> "AAA".test
2.5.1 :012?> end
=> "AAATEST"
2.5.1 :013 >

在一个模块中使用refine关键字定义细化之后,在另一个模块中使用using关键字引入这个用于定义细化的模块,细化定义的作用于就只限于调用细化模块的模块内部。

命名空间(Name Space)

在Ruby中,使用::标识引入不同作用域中的类和模块,用于界定类和模块,防止命名冲突,也让源代码的结构更加清晰。

1
2
3
4
5
6
7
8
9
10
11
12
13
2.5.1 :001 > module A
2.5.1 :002?> module B
2.5.1 :003?> class C
2.5.1 :004?> D="Constant"
2.5.1 :005?> end
2.5.1 :006?> end
2.5.1 :007?> end
=> "Constant"
2.5.1 :008 >
2.5.1 :009 > A::B::C::D
=> "Constant"
2.5.1 :010 >

在Debian系Linux中,用于标识应用的启动文件.desktop file是位于/usr/share/applications目录下的,Gnome会将这些文件在菜单中展示为启动图标,也可以固定在docker bar。

打开/usr/share/applications,可以看到有很多的.desktop文件,每一个文件就对应菜单中的一个启动图标。

如何手动编辑和制作这样一个.desktop文件呢,这里以IDEA集成开发环境为例。
我的IDEA安装在/opt/idea-IC-182.4505.22/目录,IDEA的启动脚本是/opt/idea-IC-182.4505.22/bin/idea.sh。打开/opt/idea-IC-182.4505.22/目录,还可以看到IDEA的图标文件/opt/idea-IC-182.4505.22/bin/idea.png

所以我们在/opt/idea-IC-182.4505.22/目录下创建IDEA.desktop文件,内容如下:

1
2
3
4
5
6
7
8
9
10
[Desktop Entry]
Name=IDEA
Encoding=UTF-8
Exec=/opt/idea-IC-182.4505.22/bin/idea.sh
Icon=/opt/idea-IC-182.4505.22/bin/idea.png
StartupNotify=false
Terminal=false
Type=Application
#Categories=

再将IDEA.desktop通过软链接添加到/usr/share/applications目录即可。

1
ls -s /opt/idea-IC-182.4505.22/IDEA.desktop /usr/share/applications/IDEA.desktop

再次打开菜单,即可看见创建的启动图标。如果看不到,可以先注销,再重新登录即可。

再分享两个常用的.desktop文件:

burpsuite(可用在kali上)

1
2
3
4
5
6
7
8
9
10
11
[Desktop Entry]
Name=burpsuite-pro-2
Encoding=UTF-8
Exec=sh -c "java -Xbootclasspath/p:/opt/burpsuite_pro_2.0.09/burp-loader-keygen.jar -jar /opt/burpsuite_pro_2.0.09/burpsuite_pro_v2.0.09beta.jar"
Icon=kali-burpsuite.png
StartupNotify=false
Terminal=false
Type=Application
#Categories=03-webapp-analysis;03-06-web-application-proxies;
X-Kali-Package=burpsuite

JD-GUI

1
2
3
4
5
6
7
8
9
10
[Desktop Entry]
Name=JD-GUI
Encoding=UTF-8
Exec=sh -c "java -jar /opt/jd-gui-1.4.0/jd-gui-1.4.0.jar"
Icon=/usr/share/icons/hicolor/128x128/apps/jd-gui.png
StartupNotify=false
Terminal=false
Type=Application
#Categories=03-webapp-analysis;03-06-web-application-proxies;
Name[en_US]=JD-GUI

jar命令是用来将java编译产生的.class文件打包成jar包的工具。
Jar包可以方便地对外发布,甚至就像exe一样易于使用。

这里以一个工具类JarParser为例,这个示例程序是用来遍历Jar包中的类的。

1
2
3
4
5
6
7
8
9
10
11
12
13
14
15
16
17
18
19
20
21
22
23
24
25
26
27
28
/*JarParser.java*/
/*源码转载自:https://blog.csdn.net/lululove19870526/article/details/78837119*/

import java.util.Enumeration;
import java.util.jar.JarEntry;
import java.util.jar.JarFile;

public class JarParser {

public static void main(String args[]) {
if(args.length<1) System.exit(0);
String jar = args[0];
try {
JarFile jarFile = new JarFile(jar);
Enumeration enu = jarFile.entries();
while (enu.hasMoreElements()) {
JarEntry jarEntry = (JarEntry) enu.nextElement();
String name = jarEntry.getName();
if (name.endsWith(".class"))
System.out.println("Class: "+name.replace('/','.'));
}
} catch (Exception e) {
e.printStackTrace();
}
}
}


使用javac命令编译这个Java文件:javac JarParser.java

接着创建一个文本文件,这个文件用来作为jar包中的MANIFEST.MF描述文件。

1
echo Main-Class: JarParser > test.mf

这句Main-Class的作用是指明Jar包的入口类。

最后使用jar命令打包:

1
jar cvfm JarParser.jar test.mf JarParser.class

生成的jar包使用java -jar命令运行。

系统环境:

  • Ruby: ruby 2.5.1p57 (2018-03-29 revision 63029) [x86_64-linux]
  • Rails: Rails 5.2.2
  • Gem: 2.7.7
  • SQLite: sqlite3 (1.4.0, 1.3.13)

今天在基于上面的环境使用Rails新建项目的时候,报了一个ActiveRecord::ConnectionNotEstablished错误。
根据排查,是由于SQLite3 gem版本问题导致的。
具体的报错内容如下:

1
Puma caught this error: Error loading the 'sqlite3' Active Record adapter. Missing a gem it depends on? can't activate sqlite3 (~> 1.3.6), already activated sqlite3-1.4.0. Make sure all dependencies are added to Gemfile. (LoadError)

页面报错如下:

1
2
3
ActiveRecord::ConnectionNotEstablished
No connection pool with 'primary' found.

后来找到了解决方法,修改Gemfile,将sqlite3的版本降级到1.4.0以下即可。
修改Gemfile:

1
2
3
4
5
6
7
8
9
10
11
12
13
14
15
16
17
18
19
20
21
22
23
24
25
26
27
28
29
30
31
32
33
34
35
36
37
38
39
40
41
42
43
44
45
46
47
48
49
50
51
52
53
54
55
56
57
58
59
60
61
62
63
64
source 'https://rubygems.org'
git_source(:github) { |repo| "https://github.com/#{repo}.git" }

ruby '2.5.1'

# Bundle edge Rails instead: gem 'rails', github: 'rails/rails'
gem 'rails', '~> 5.2.2'
# Use sqlite3 as the database for Active Record
gem 'sqlite3', '< 1.4.0' # <<修改这里,将sqlite3版本设定为小于1.4.0
# Use Puma as the app server
gem 'puma', '~> 3.11'
# Use SCSS for stylesheets
gem 'sass-rails', '~> 5.0'
# Use Uglifier as compressor for JavaScript assets
gem 'uglifier', '>= 1.3.0'
# See https://github.com/rails/execjs#readme for more supported runtimes
# gem 'mini_racer', platforms: :ruby

# Use CoffeeScript for .coffee assets and views
gem 'coffee-rails', '~> 4.2'
# Turbolinks makes navigating your web application faster. Read more: https://github.com/turbolinks/turbolinks
gem 'turbolinks', '~> 5'
# Build JSON APIs with ease. Read more: https://github.com/rails/jbuilder
gem 'jbuilder', '~> 2.5'
# Use Redis adapter to run Action Cable in production
# gem 'redis', '~> 4.0'
# Use ActiveModel has_secure_password
# gem 'bcrypt', '~> 3.1.7'

# Use ActiveStorage variant
# gem 'mini_magick', '~> 4.8'

# Use Capistrano for deployment
# gem 'capistrano-rails', group: :development

# Reduces boot times through caching; required in config/boot.rb
gem 'bootsnap', '>= 1.1.0', require: false

group :development, :test do
# Call 'byebug' anywhere in the code to stop execution and get a debugger console
gem 'byebug', platforms: [:mri, :mingw, :x64_mingw]
end

group :development do
# Access an interactive console on exception pages or by calling 'console' anywhere in the code.
gem 'web-console', '>= 3.3.0'
gem 'listen', '>= 3.0.5', '< 3.2'
# Spring speeds up development by keeping your application running in the background. Read more: https://github.com/rails/spring
gem 'spring'
gem 'spring-watcher-listen', '~> 2.0.0'
end

group :test do
# Adds support for Capybara system testing and selenium driver
gem 'capybara', '>= 2.15'
gem 'selenium-webdriver'
# Easy installation and use of chromedriver to run system tests with Chrome
gem 'chromedriver-helper'
end

# Windows does not include zoneinfo files, so bundle the tzinfo-data gem
gem 'tzinfo-data', platforms: [:mingw, :mswin, :x64_mingw, :jruby]


修改完后执行bundle即可。

你在MongoDB启动时也遇到以下警告吗?

1
2
3
WARNING: You are running on a NUMA machine.
We suggest launching mongod like this to avoid performance problems:
numactl –interleave=all mongod [other options]

这是当MongoDB运行在非统一内存访问架构 NUMA(Non Uniform Memory Access Architecture)下产生的性能告警。
关于NUMA是什么,可以参考这篇文章:Non-uniform memory access

这里主要提一下在CentOS 7系统、NUMA架构服务器中上述告警该如何消除。

首先需要使用numactl这个命令,而这条命令服务器中默认是没有的,在支持NUMA架构的CentOS7服务器中,可以运行yum install numactl来安装它。

接着关闭MongoDB服务:
systemctl stop mongod

disable掉MongoDB服务的自动启动:
systemctl disable mongod

使用numactl来启动MongoDB:
numactl --interleave=all mongod --config /etc/mongod.conf

如果想要开机自动使用numactl启动MongoDB,将上述命令写到开机启动的脚本文件中即可。

笔者尝试修改mongod.service服务描述中的ExecStart选项,尝试将numctl作为mongod服务的执行体时报了很多错,如果你有相关的解决方法,欢迎来信或在评论里探讨。

笔者有一台CentOS 7系统的Linux服务器,在通过ssh远程连接的时候,一直存在两个问题。
一是连通速度缓慢,ping服务器速度很快,但是SSH连接的响应非常慢。
再有就是连接一段时间,客户端这边如果没有操作和输入,服务器就会自动断开,每次都要重新连,很麻烦。

昨天晚上仔细检查了一下CentOS 7 sshd的配置,终于解决了这两个问题。其实很easy,修改CentOS默认的sshd配置就行了。

针对第一个ssh连接响应缓慢的问题,在/etc/passwd文件里这样配置就行了:

大概是在第129行的位置,找到UseDNS选项,取消前面的注释,将yes改为no即可:

1
2
3
4
5
6
7
127 #ClientAliveCountMax 3
128 #ShowPatchLevel no
129 UseDNS no
130 #PidFile /var/run/sshd.pid
131 #MaxStartups 10:30:100
132 #PermitTunnel no
133 #ChrootDirectory none

针对第二个连接超时timeout的问题,同样是修改sshd配置,大概在第126行的位置,找到选项ClientAliveInterval,将其值修改为30:

1
2
3
4
5
6
123 UsePrivilegeSeparation sandbox          # Default for new installations.
124 #PermitUserEnvironment no
125 #Compression delayed
126 ClientAliveInterval 30
127 #ClientAliveCountMax 3
128 #ShowPatchLevel no

这样ssh服务器就会每隔30秒判断一次客户端是否超时,由于30秒一般是不会超时的,所以连接就能持续。
而第127行的选项也可以关注一下,它代表的是最大的超时次数。

完美修复文章开头提到的两个问题。

Python 3 通过SMTP库发送普通邮件(Through SSL)

1
2
3
4
5
6
7
8
9
10
11
12
13
14
15
16
17
18
19
20
21
22
23
24
25
26
27
28
29
30
31
32
33
34
35
36
37
38
39
40
41
42
43
44
45
#!/usr/bin/python3

import smtplib
from email.header import Header
from email.mime.text import MIMEText
from email.mime.image import MIMEImage
from email.mime.multipart import MIMEMultipart

mail_host = "smtp.chorder.net"
mail_port = 994
mail_user = "[email protected]"
mail_pass = "password"

sender_name = "Example"
sender_account = '[email protected]'
receivers = ['[email protected]']
receiver_name = "Somebody"

subject = 'Mail Subject'
mail_msg = '''
<h1>This is a test main</h1>
<p>Some text</p>
'''


msgRoot = MIMEMultipart('related')
msgRoot['From'] = Header(sender_name, 'utf-8')
msgRoot['To'] = Header(receiver_name, 'utf-8')
msgRoot['Subject'] = Header(subject, 'utf-8')

msgAlternative = MIMEMultipart('alternative')
msgAlternative.attach(MIMEText(mail_msg, 'html', 'utf-8'))

msgRoot.attach(msgAlternative)

try:
smtpObj = smtplib.SMTP_SSL( mail_host, mail_port )
#smtpObj.ehlo()
#smtpObj.set_debuglevel(1)
smtpObj.login( mail_user, mail_pass )
smtpObj.sendmail(sender_account, receivers, msgRoot.as_string())
print ("邮件发送成功")
except smtplib.SMTPException:
print ("Error: 无法发送邮件")

Python 3 通过SMTP库发送带图片的邮件(Through SSL)

1
2
3
4
5
6
7
8
9
10
11
12
13
14
15
16
17
18
19
20
21
22
23
24
25
26
27
28
29
30
31
32
33
34
35
36
37
38
39
40
41
42
43
44
45
46
47
48
49
50
51
52
53
54
55
56
#!/usr/bin/python3

import smtplib
from email.header import Header
from email.mime.text import MIMEText
from email.mime.image import MIMEImage
from email.mime.multipart import MIMEMultipart

mail_host = "smtp.chorder.net"
mail_port = 994
mail_user = "[email protected]"
mail_pass = "password"

sender_name = "Example"
sender_account = '[email protected]'
receivers = ['[email protected]']
receiver_name = "Somebody"


subject = 'Mail Subject'
mail_msg = '''
<h1>This is a test main</h1>
<p>Some text</p>
<h2>Image</h2>
<p><img src="cid:image1"></p>
'''

# add image attachment
fp = open('test.png', 'rb')
msgImage = MIMEImage(fp.read())
fp.close()

msgImage.add_header('Content-ID', '<image1>')

msgRoot = MIMEMultipart('related')

msgRoot['From'] = Header(sender_name, 'utf-8')
msgRoot['To'] = Header(receiver_name, 'utf-8')
msgRoot['Subject'] = Header(subject, 'utf-8')

msgAlternative = MIMEMultipart('alternative')
msgAlternative.attach(MIMEText(mail_msg, 'html', 'utf-8'))

msgRoot.attach(msgAlternative)
msgRoot.attach(msgImage)

try:
smtpObj = smtplib.SMTP_SSL( mail_host, mail_port )
#smtpObj.ehlo()
#smtpObj.set_debuglevel(1)
smtpObj.login( mail_user, mail_pass )
smtpObj.sendmail(sender_account, receivers, msgRoot.as_string())
print ("邮件发送成功")
except smtplib.SMTPException:
print ("Error: 无法发送邮件")

Your browser is out-of-date!

Update your browser to view this website correctly. Update my browser now

×